Preconditions
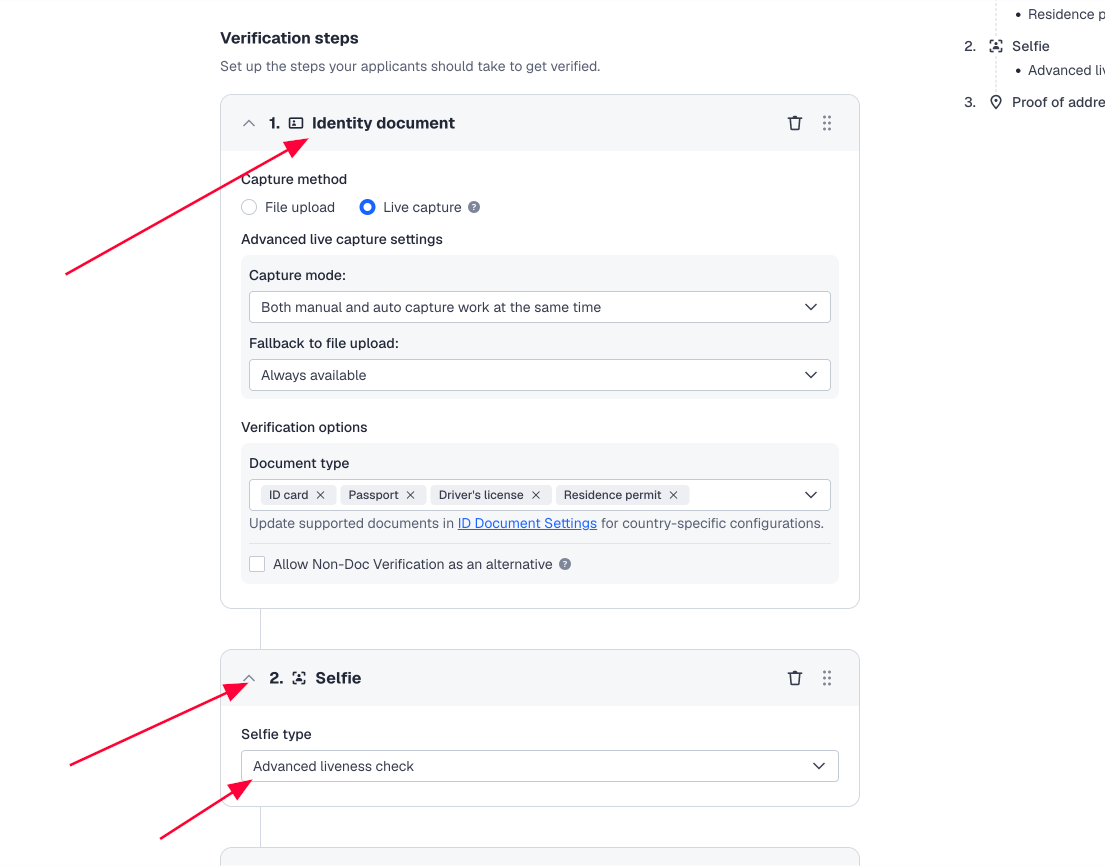
SumSub verification level must have below verification steps:
- Identity document
- Selfie
- Selfie type must be: Advanced liveness check
This requirement is both for Sandbox and Production
1) Configure Sandbox mode for verification testing
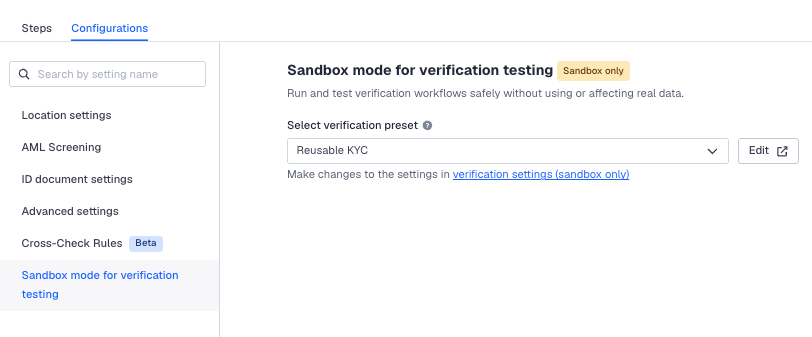
Switch to the Sandbox in the Dashboard:

Navigate to the Sandbox mode for verification testing page.
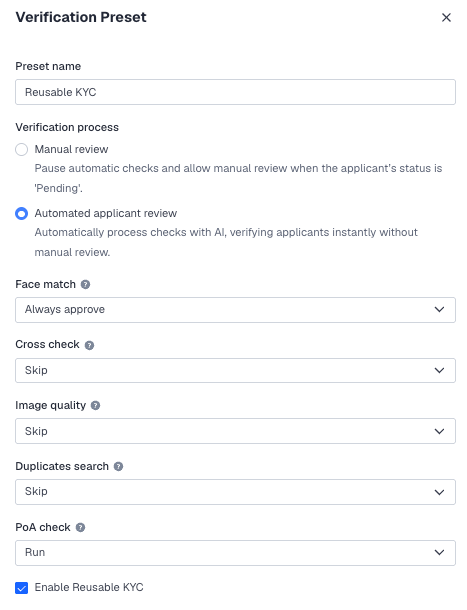
Select Create new verification preset:
- Select Automated applicant review
- Face match - set to Always approve
- Cross check - set to Skip
- Image quality - set to Skip
- Duplicates search - set to Skip
- PoA check - set to Run
- Check the box Enable Reusable KYC
Save the preset and apply it to the relevant verification level:
2) Create applicant
Create an applicant in Sandbox in your chosen level. Make sure the applicant is approved, has reusable documents, and meets the requirements of the level you want to test with.
- PoI - image should contain the same face as on Selfie
- Do not use docs from Verification Document Templates here, otherwise it won't work because PoI face should match Selfie face - you can just take a picture of you or upload a Selfie picture as PoI doc
- Selfie - should be real selfie capture
- PoA - you can use, e.g. PoA for Germany (Approved) from the Verification Document Templates
3) Generate share token
Via SumSub API
Use this API method:
- applicantId - ID of the cteated applicant
- forClientId - should be
recary - ttlInSecs - reasonable time-to-live in seconds
{
    "applicantId": "6983189c432c7a7c364bb72d",
    "forClientId": "recary",
    "ttlInSecs": "15552000"
}
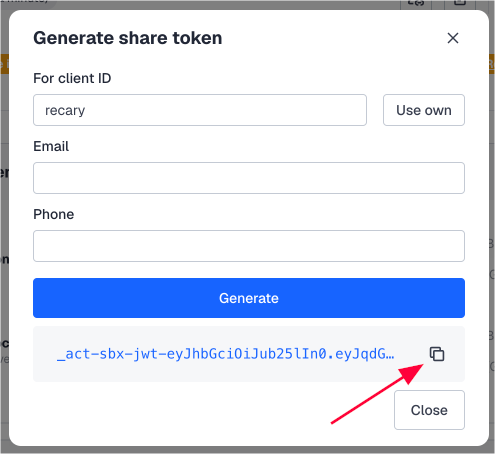
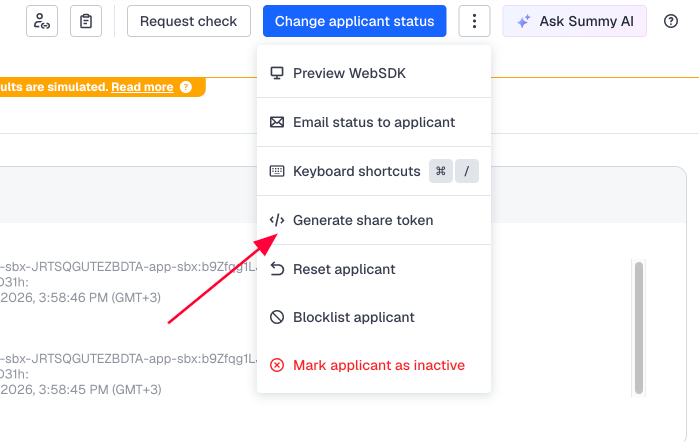
Via SumSub UI
Open applicant you want to import.
Choose Generate share token as shown below:
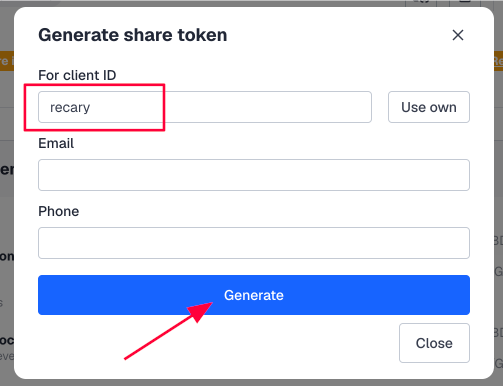
Use recary as For client ID and press Generate as shown below:
Copy share token as shown below: